


General Tutorials
有特色的模板
og体育首页ONE Subscrioption


使用下面的说明,您将学习的基础知识 TM Mega Layout module management, e.g. changing in-built presets and adding new in Eveprest based template.
Navigate to 模块和服务, locate TM Mega Layout module and tap configure;

The module includes Main Layouts management and Product Page layout management.
Main Layouts 包括以下页面的区域:
Header-位于主要的顶部区域 website;
Top Column-位于 header area;
Home-主页主体/主要内容区;
Footer-位于页面的最底部;

Product Page layout 将允许您创建自定义 layout for the 单个产品页面 footer;
Select either Main Layouts or Product Page 选项,在右上方,选择区域/位置;
Next to Add a Preset 按钮,选择任何可用的预设,并启用 Use as Default option;
You will see black rating star 图标旁边的图标 preset 这意味着 preset 已被激活;
预设可以单独应用于不同的页面. Next to Use as default tab, click All pages 链接并选择您想要应用的页面 preset 从下拉列表. The 半黑星 图标会出现在 preset,这意味着 preset 已应用于特定页面;

本教程的这一部分将向您展示如何创建自定义 layout presets.
选择适合你的职位 preset, and click green Add a Preset button;
该窗口将提示您输入您的 preset,写上你喜欢的任何名字;
Pick either Add wrapper or Add row. Wrapper 可以采取行,列和模块. 它是一个盒子,可以给你额外的控制 layout;
You will see a tab 右边有几个图标:
Trash Icon - removes block;
Blocks Icon -允许您添加自定义 Selector 哪些可以以后用于定制 CSS or JavaScript;
Pencil Icon - in-built style editor allows you to add background 图像,颜色,边框样式以及框阴影;
Drag Icon 允许您通过拖放来改变块相对于包装器内其他块的位置;

Click the Add row button;
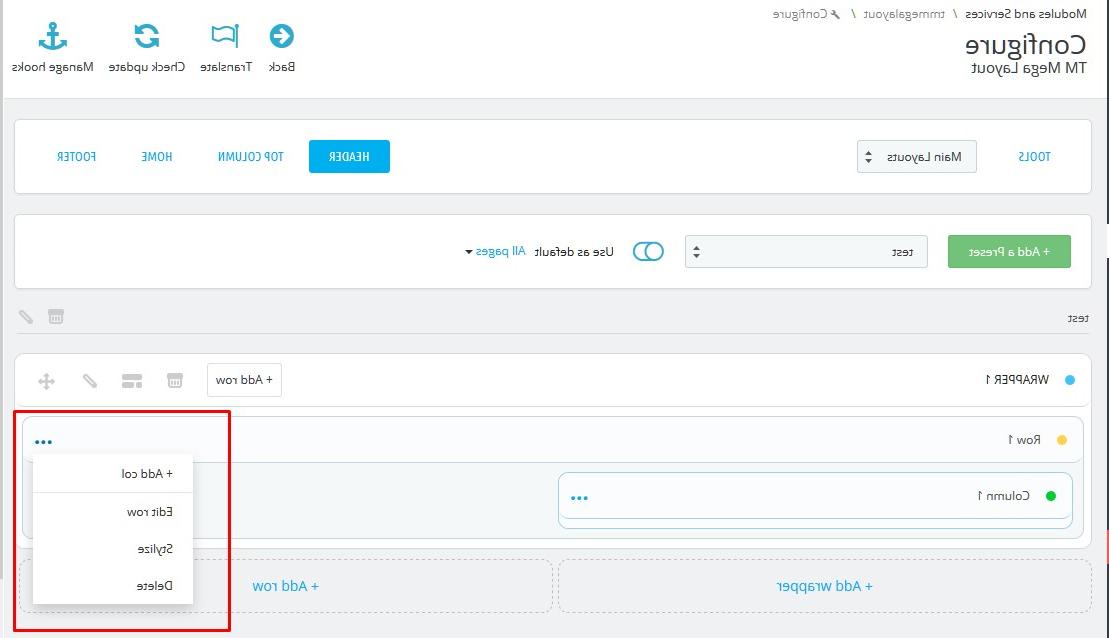
Tap Ellipsis 右侧图标:
Select Edit Row 添加自定义选项 CSS/JavaScript selector;
Select Stylize 向行添加自定义样式;
Click Delete to remove row;
Choose Add col option. Add a specific selector and pick bootstrap classes 为列中提示;

Click on the Ellipsis in the column tab, and select Add Module.

Pick the module 的列中显示 Select a module dropdown list and tap the Confirm button;

NOTE! The module 将不会出现在可用列表中,直到它被钩到对应的 position.
NOTE! TM Mega Layout 使用以下命令保存更改 AJAX. 建议清除 smarty cache 一旦修改被执行.
NOTE! In case TM Mega Layout module 是去激活,默认预设会被禁用吗. 模块将恢复到其默认外观.
浏览高品质的广泛收藏 PrestaShop模板 if you need more!
请随时查看下面的详细视频教程:
PrestaShop 1.6.x. 如何切换模板皮肤并创建一个新皮肤(基于Eveprest)